In Claim your business in ChatGPT I mentioned a "$500 advertising credit" card in Business Hub. This post follows that card: I set up a real ChatGPT Ads campaign for a small fixed-price service, with a small budget, and wrote down every screen. The product and brand are blurred in the screenshots; the settings are what matter here.
Short answer
You create ChatGPT ads in OpenAI's Ads Manager (ads.openai.com), signed in with your ChatGPT account. You give it your website, it drafts a campaign, an ad group and an ad, and you fix what it guessed. The minimum budget is $25 a day, or $100 in total for the campaign. Ad titles are limited to 32 characters and descriptions to 54, and the image should be square. Ads run only after you add a payment method and the ad passes review. Don't use the name "ChatGPT" in your ad: mine was rejected for it.
Before you start: the $500 credit is a match, not a gift
The Business Hub card says "Get $500 in advertising credit". In Ads Manager the offer is spelled out: spend $500 on eligible campaigns by a deadline, and $500 in ad credit is added to your account. You pay the first $500 yourself.
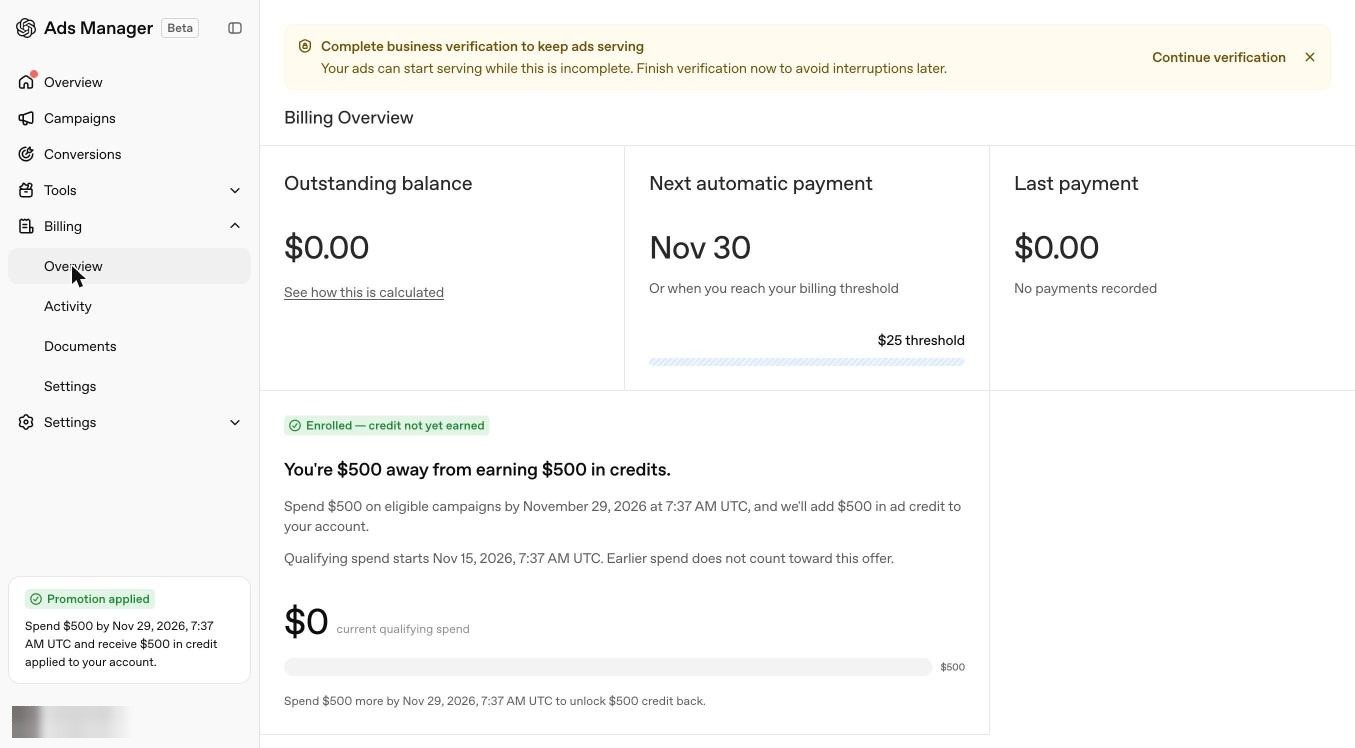
Three details from that screen:
- The deadline is short. The ads site said the offer runs until December 31. My account got November 29, 2026: 14 days after I enrolled. Check the date in your own account.
- Only spend after enrolling counts. "Earlier spend does not count toward this offer."
- Billing is by threshold. Ads Manager charges your card when spend reaches the billing threshold ($25 for me) or on the next automatic payment date, whichever comes first.
I didn't have $500 to spend on a test, so I skipped the credit and ran the smallest campaign Ads Manager allows.
Step 1: Sign in to Ads Manager
Go to ads.openai.com and sign in with your ChatGPT account. One login can hold more than one ad account. An abandoned setup stays as an account; I ended up with two with the same name.
Country, currency and time zone can't be changed later, so pick them carefully. The interface language can: it's under your account menu at the bottom left.
Step 2: Let it read your site, then check the draft
Enter your website and Ads Manager builds a first campaign, ad group and ad for you. It's a good start, but every default needs a look:
| Setting | Default it gave me | What I changed |
|---|---|---|
| Objective | Clicks | Kept |
| Location | United States | Kept |
| Platforms | All platforms | Kept |
| Daily budget | $100 | $25 |
| Creative enhancement | On | Kept on (see below) |
| Link | Home page | The product page |
| Title | My site's title, 45 characters (limit 32) | A new 29-character title |
| Description | Empty | Written |
$100 a day would spend a $500 budget in five days. And with the description empty you can't move on to billing; Ads Manager asks you to fix the ad first.
Step 3: Campaign settings
Fields: campaign name, objective, conversion event, locations to include and exclude, eligible platforms, tracking parameters, custom audiences, budget, start and end date, and creative enhancement. The setup wizard shows fewer of them; after setup, Edit Campaign shows all of them.
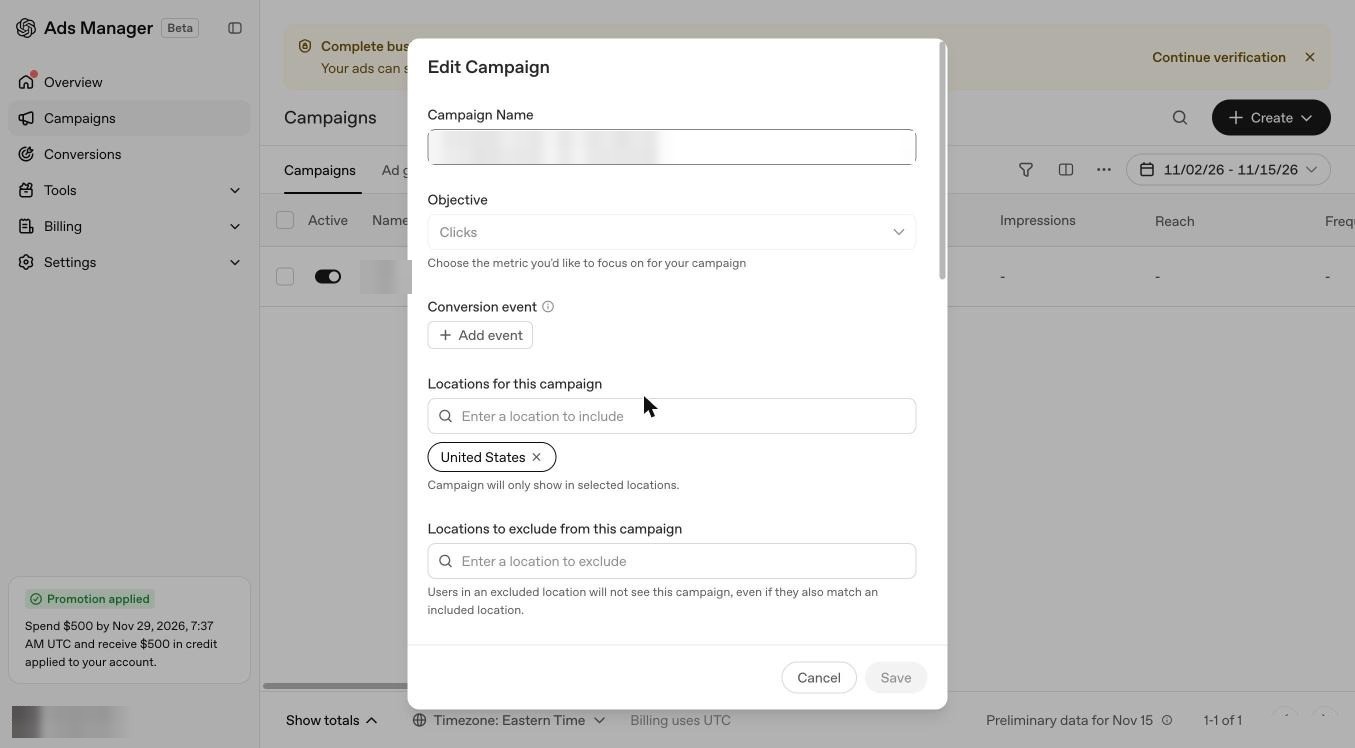
Budget. You choose a daily budget or a total budget for the campaign:
- Daily budget: minimum $25.
- Total budget: minimum $100.
- The daily budget is an average. On a single day Ads Manager can spend up to twice that ($50 on a $25 budget), and over 7 days up to 7 times it ($175).
- You can switch a campaign budget to a daily budget later, but not back.
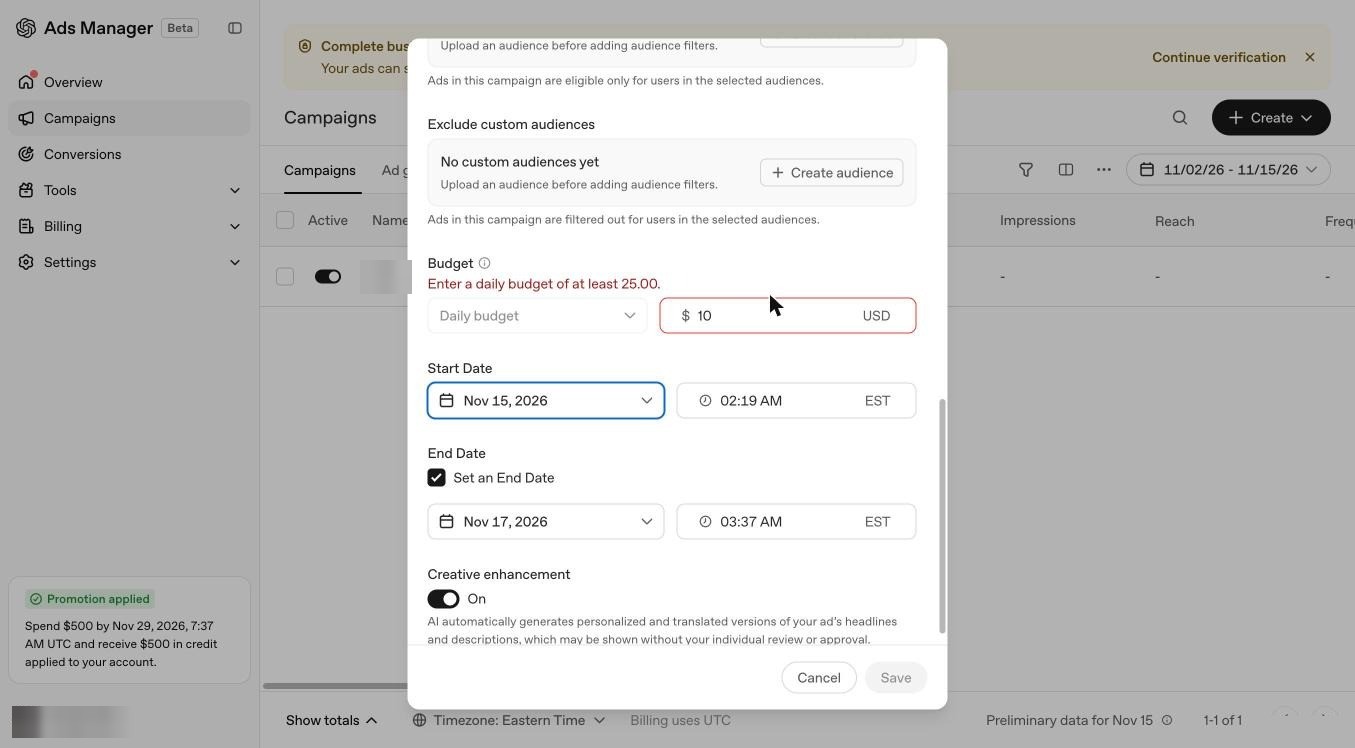
Creative enhancement. When it's on, "AI automatically generates personalized and translated versions of your ad's headlines and descriptions, which may be shown without your individual review or approval." I left it on to see what it does; turn it off if your wording has to stay exact.
Step 4: Ad group
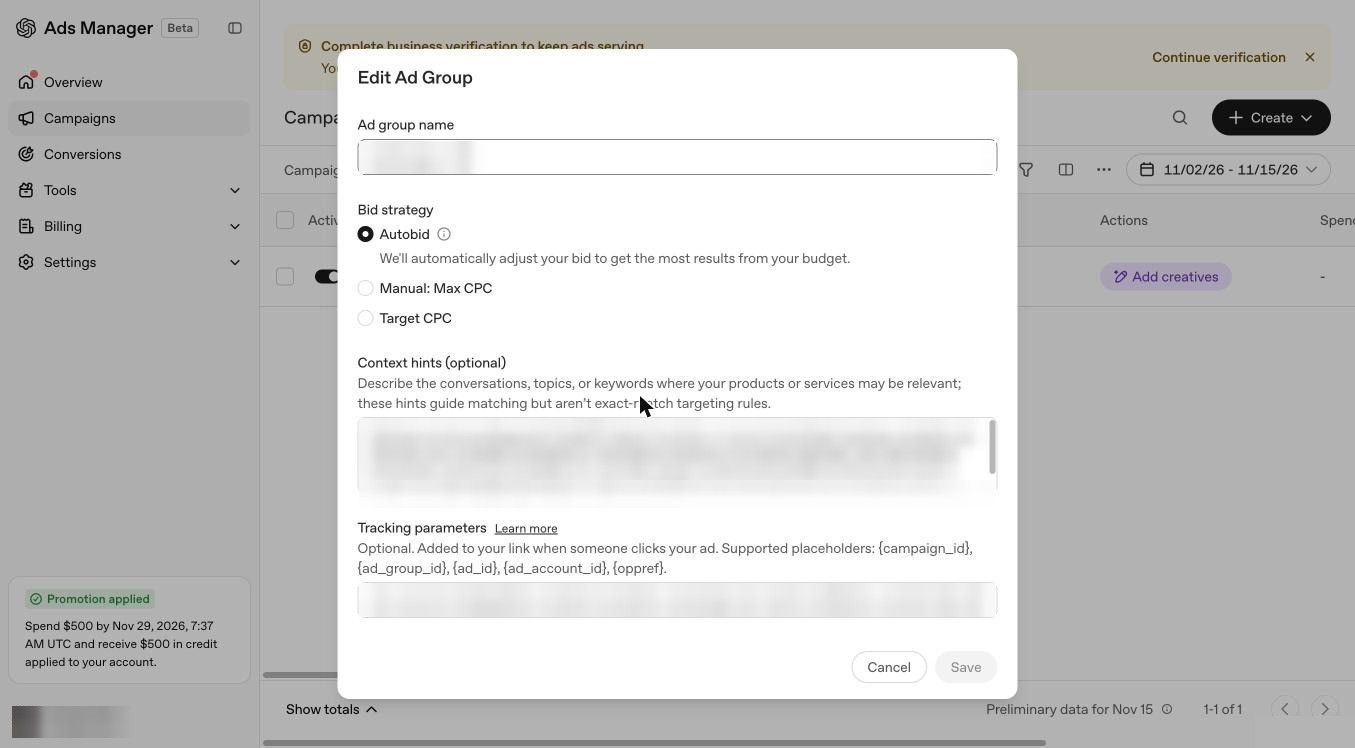
Fields: ad group name, bid strategy, context hints and tracking parameters.
- Bid strategy. The setup wizard gave me only Autobid. Edit Ad Group later also offers "Manual: Max CPC" and "Target CPC". For a first test, Autobid is fine.
- Context hints are not keywords. In Ads Manager's words they "guide matching but aren't exact-match targeting rules". You describe the conversations and topics where your service fits. I wrote the questions my customers ask before they buy, as plain sentences.
- Tracking parameters. Add UTM tags so you can see the traffic in your own analytics. Supported placeholders:
{campaign_id},{ad_group_id},{ad_id},{ad_account_id},{oppref}. For example:utm_source=chatgpt&utm_medium=cpc&utm_campaign=your-campaign&utm_content={ad_id}.
Step 5: The ad
- Format: single image or multiple images.
- Title: 32 characters. Description: 54 characters. Even at 29 of 32, Ads Manager warns: "Copy may be truncated in some placements."
- The ad has its own link and tracking parameters. Changing them on the ad group doesn't change an ad that already exists; I had to fix both.
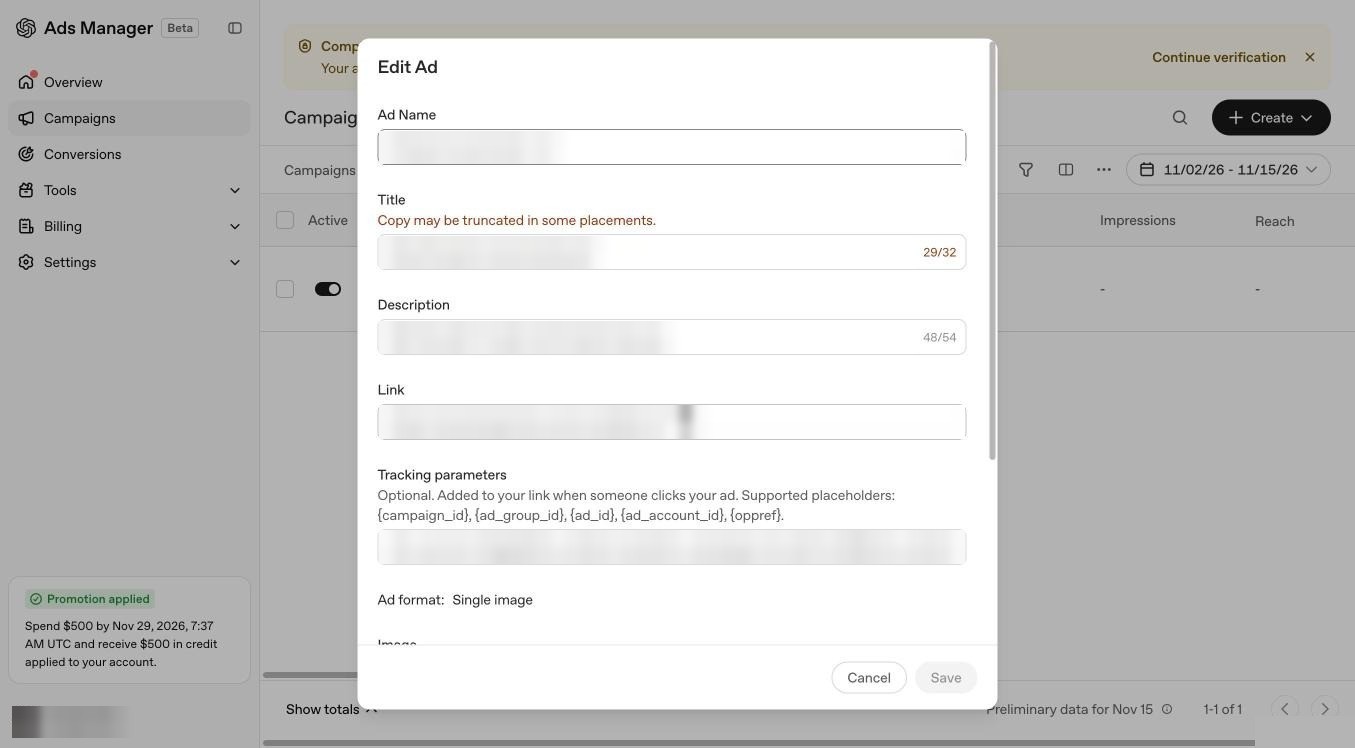
The preview shows your logo, brand name, an "Ad" label, the title and the description:
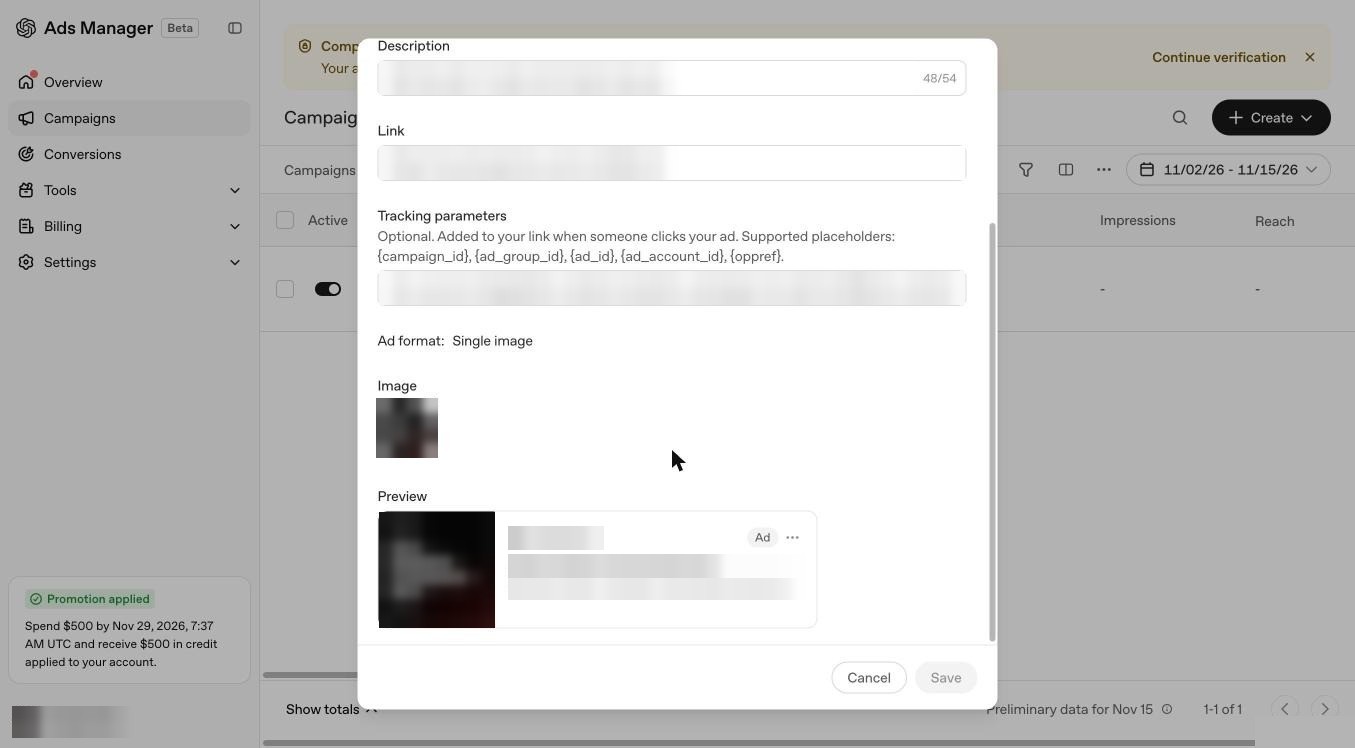
Use a square image made for the ad
Image: PNG or JPG, square recommended, at least 256 x 256. Ads Manager pulls your page's Open Graph image, which is 1200 x 630. Cropped to a square, its text gets cut in half.
Two traps:
- When I changed the link, Ads Manager also pulled the new page's image. Removing the old image just brought the new one forward; I had to remove that too before I could upload my own.
- Upload opens a square crop window. Make the image square from the start so nothing important is cropped.
I made a 1080 x 1080 image with large text. In the preview the image is only about 116 pixels wide, so small text is unreadable.
Step 6: Review and billing
The review page summarizes the campaign, ad group and ad. Clicking next accepts the Ads Manager terms and takes you to billing: card or Google Pay, a billing email and your legal business name. My card got a temporary hold of $24.50, which the page said can take about 8 days to clear, depending on your bank.
You can skip billing and set it up later, but nothing runs until a payment method is added. Ads also go through review before they run.
The rejection: don't put "ChatGPT" in your ad
My first ad's title asked whether ChatGPT recommends you, and the image used the name "ChatGPT" too. It was not approved, under OpenAI Brand Safety: Platform integrity and misrepresentation, and the notice said this rejection couldn't be appealed.
OpenAI didn't say which part was the problem. My reading: an ad inside ChatGPT that uses ChatGPT's name and talks about being recommended by ChatGPT can look like it's connected to ChatGPT or can influence its answers.
What I changed: I kept the same question but replaced "ChatGPT" with "AI search", in the title, the description and the image. That version was approved and is serving. So the idea of being recommended was fine; the name "ChatGPT" wasn't.
One more thing to know: right after resubmitting I saw the rejection message again, but it belonged to the old version. After a refresh, the new version had no policy note.
Step 7: Set an end date (after setup)
The setup wizard doesn't ask for an end date, but Edit Campaign does: a start date with time, and "Set an End Date". Find it in the campaign's "..." menu.
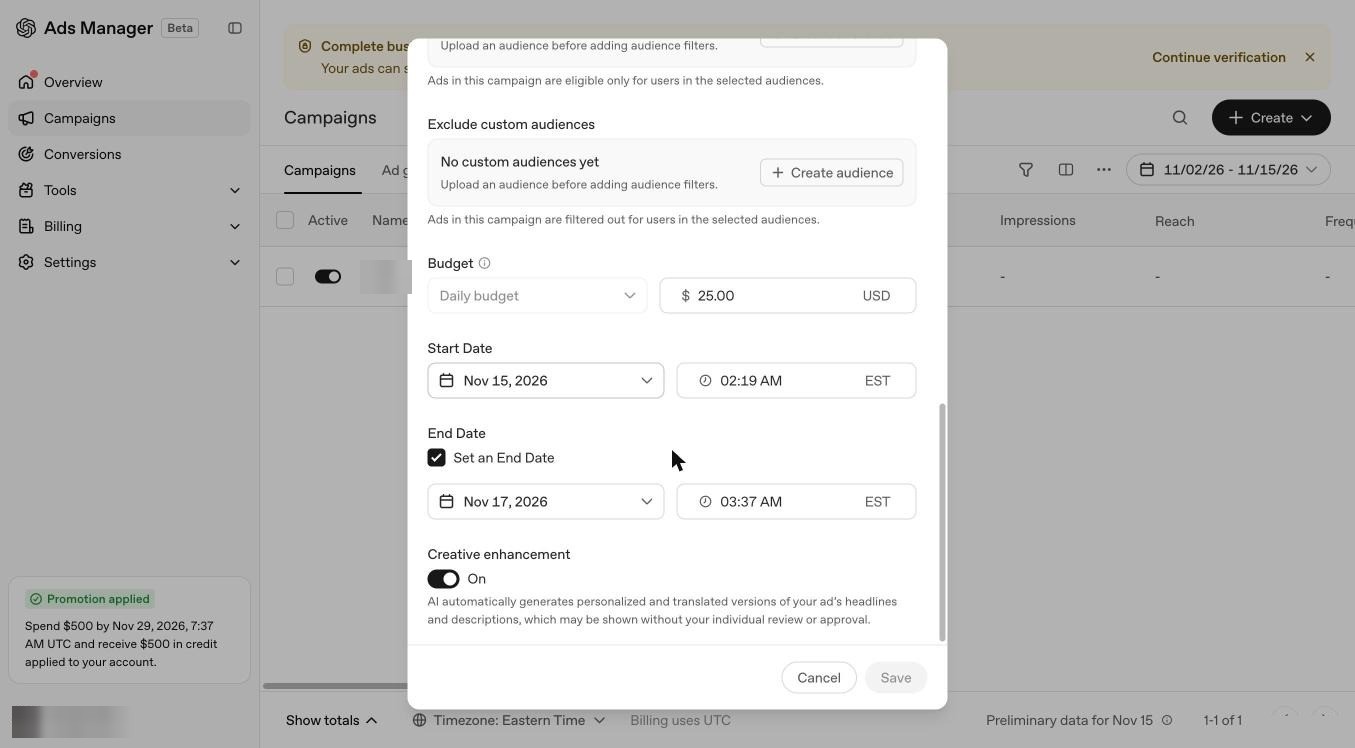
My campaign went live on November 15 at 02:19 EST and ends on November 17 at 03:37 EST: about 49 hours, so at $25 a day it should spend $50 to $100 at most.
After the card was added, a banner asked me to complete business verification to keep ads serving. The ad was already serving while that was pending.
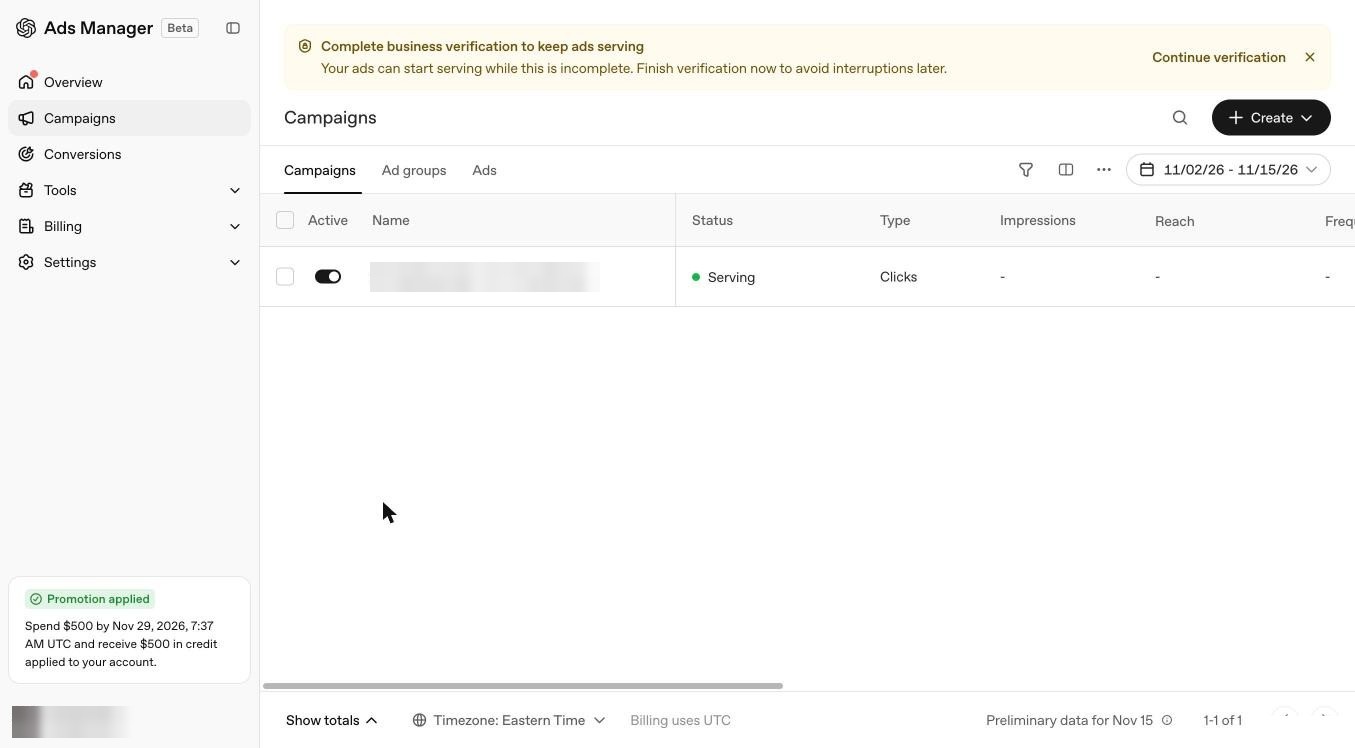
Results
Coming after the campaign ends on November 17.
Checklist
- Check the $500 credit deadline in your account, and whether you'll really spend $500.
- Pick country, currency and time zone carefully; they can't change.
- Replace the drafted $100 daily budget; the minimum is $25 a day or $100 total.
- Point the ad at the page that sells, not your home page.
- Add UTM tags on both the ad group and the ad.
- Title up to 32 characters, description up to 54.
- Upload a square image with large text.
- Don't use "ChatGPT" in text or image.
- Add a payment method; nothing runs without it.
- Set an end date in Edit Campaign.